A Line Height of 70 can make an FC 27 team feel dominant when pressing forward. The higher block compresses the space available for the opponent's build-up. But when the first line of pressure is bypassed, the space behind your midfield becomes the next target. The problem isn't always the line itself. Sometimes it's the protection in front of it—or the lack of it.
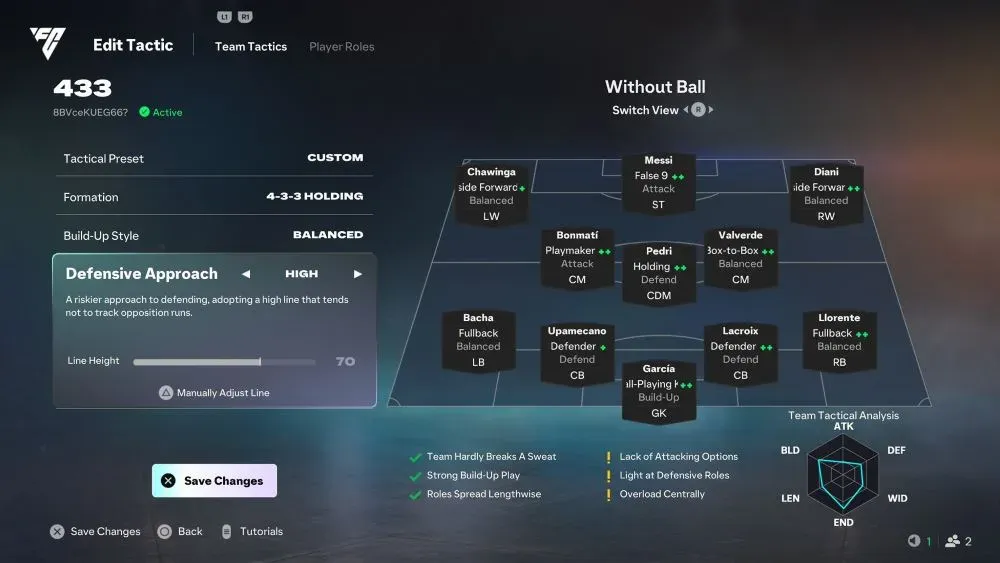
Tactic Code and Setup
Tactic Code: 8BVceKUEG66?
| Setting | Configuration |
|---|---|
| Formation | 4-3-3 |
| Defensive Approach | High |
| Line Height | 70 |
| CDM | Pedri — Holding / Defend |
| CM | Bonmatí — Playmaker / Attack |
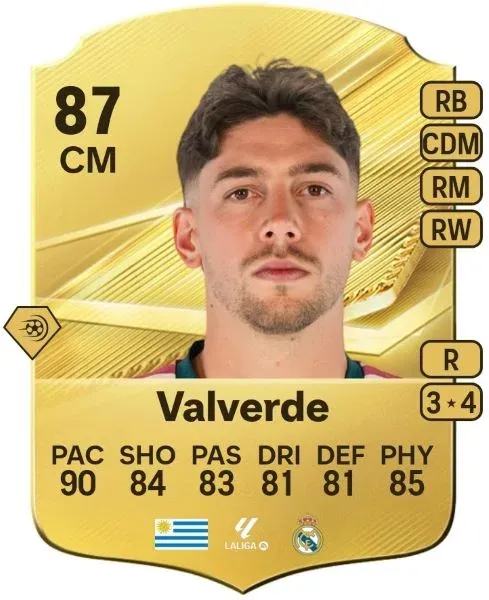
| CM | Valverde — Box-to-Box / Balanced |
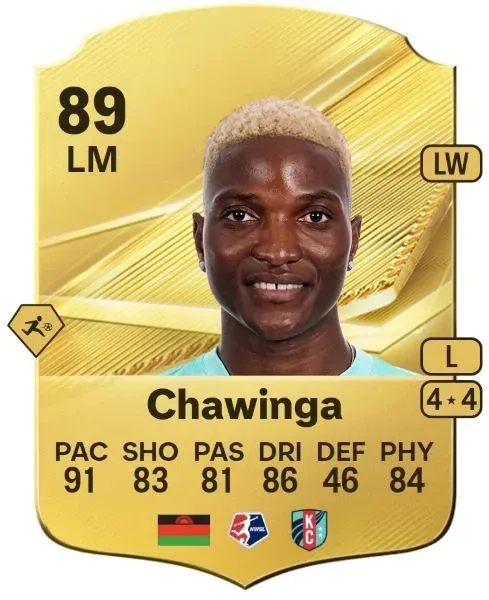
| Wide Forwards | Chawinga and Diani — Inside Forward / Balanced |
| Fullbacks | Bacha and Llorente — Fullback / Balanced |
| ST | Messi — False 9 / Attack |
Import the code and check that the formation, player roles, and focuses match the setup above. You can keep the structure while making small adjustments to suit your squad.
EA's Title Update v1.2.0 specifically addresses extreme defensive line heights. The Pitch Notes state that defenders using those settings "will now drop off sooner while still maintaining a higher line than other tactics," and the section is explicitly filed under 95 Depth. The notes do not announce the same adjustment for the standard High range. At 70, you should still treat the space behind your back four as a genuine defensive risk rather than assuming the update has solved it. That risk becomes sharper when the player responsible for screening that space is the only one doing it.
The same update also improves attacking runs, helping AI players read defensive lines and stay onside more effectively. AI teammates also make more purposeful supporting runs and better use of space around the box. That makes tracking runs behind your back four an important part of defending a high line, even when you are not using 95 Depth.
Our Sacchi 7 breakdown explores how an additional Holding midfielder supports a High defensive line. This 4-3-3 setup takes a different approach: Pedri is the only dedicated Holding midfielder, with Bonmatí and Valverde assigned more attack-oriented roles. That makes one defensive decision especially important—what happens when Pedri gets dragged out of position?
Pedri Gets Dragged. Then What?
Pedri on Holding / Defend is a sound role. The problem is what happens after he steps out. Bonmatí is on Playmaker / Attack—she wants to receive between the lines. Valverde's Box-to-Box role gives the midfield another option to support attacks, but it does not provide the same positional security as a dedicated defensive midfielder. When possession turns over, both are naturally ahead of the ball.
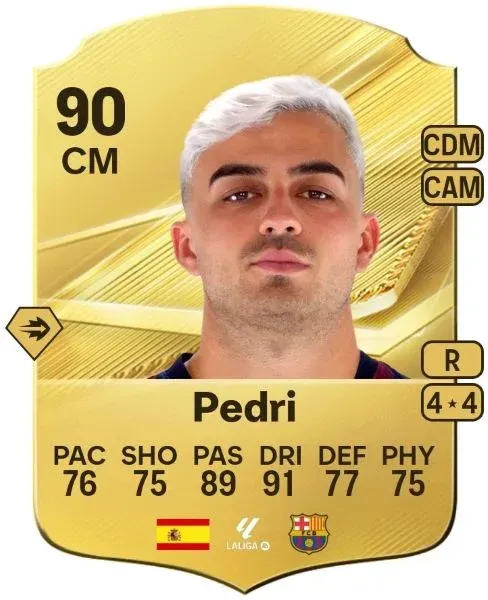
This is where the line height matters. Picture the sequence: the opponent's midfielder carries the ball toward Pedri's zone. You manually step Pedri out to meet him—the correct instinct. The pass goes into the space Pedri just vacated. Bonmatí is ahead of the ball, closer to the opponent's box than her own. Valverde is moving forward rather than staying in a position to cover Pedri. Your center backs are positioned higher up the pitch, leaving them with less room to recover if the next pass beats the midfield.
You now have a choice. Keep controlling Pedri and chase the ball backward, which means your CBs are exposed to the next pass. Or switch to a center back and manually cover the through-ball, which means the opponent can advance unchallenged into the midfield space you just abandoned. Neither option is clean. That is the single-pivot tax at 70: you are not choosing between good and bad outcomes, only between two imperfect ones.
For another way to structure a high-line midfield, see our 4-3-3 False 9 high-line setup. It uses two Ball-Winning Box-to-Box midfielders alongside a dedicated Holding CDM, giving the defensive phase a different kind of support.
The Wide Channels Are the Second Leak
Chawinga and Diani are both Inside Forwards on Balanced. Width has to come from Bacha and Llorente at fullback. When the opponent wins the ball in midfield and immediately looks wide, the space behind an advanced fullback can still become a dangerous outlet. Title Update v1.2.0 improves fullback positioning by preventing them from dropping too deep while defending, but that does not eliminate the space left when a fullback pushes forward. With a 70 line, your defensive shape still needs to account for that channel.
What the Three Warnings Get Right
Lack of Attacking Options is the mildest warning. The central corridor can crowd with a False 9 and two Inside Forwards. The fix is switching wide before the middle closes—not changing the formation.
Overload Centrally is a feature in possession and a warning out of it. It only helps if the rest of the shape is ready for the second ball.
Light at Defensive Roles is the honest one. It is EA's own analysis telling you the single pivot is being asked to do the job of one and a half players. At 70, that extra half-job is exactly the space behind the back four.
Three Adjustments Without Rebuilding
When direct passes are splitting you: Try 65 before dropping further. Dropping straight to 50 may solve some immediate pressure, but it also moves the setup out of the High defensive range and changes the tactic's identity. At 65, you remain in the High band while giving your back line slightly more room to react to direct passes.
When the middle disappears after turnovers: Change Valverde from Box-to-Box / Balanced to Ball-Winning Midfielder / Defend. This gives Pedri a second body in the defensive phase without asking Bonmatí to stop creating. You lose Valverde's late supporting runs, but Bonmatí and the Inside Forwards already provide central attacking presence.
For a broader explanation of how Holding, Box-to-Box, and Playmaker roles complement one another, read our FC 27 midfield roles breakdown.
When the attack feels narrow: Push one fullback's attacking focus forward and keep the other more conservative. Choose the side based on where the opponent leaves space, rather than automatically pushing both.
This setup rewards manual defending. The key is knowing when to step out, when to switch defenders, and when to bring another midfielder into the defensive screen. If you are comfortable stepping Pedri out and recognizing when to switch to a CB to cover the vacated space, a 70 line can still suffocate opponents who want to play through the middle. The line height is not the villain. The missing second pivot is.